:)
I had leftover whipped potatoes in the fridge, from our Thanksgiving feast last weekend.
To be honest, they looked a little gross. Cold potatoes have never really been my jam on a good day, but these were grey and congealed from having milk in them. Yet somehow, despite taking on an outward appearance that smacked of shiny beige rubber, they managed to still be quite dry and crumbly.
 |
| Blech! |
Oh well...
I had a good idea for how to use them up.
Kartofelnpuffer!!!
That's potato pancakes by the by.
Now, I'm no stranger to making potato pancakes. I've tried them many different ways, and my favourite is still the traditional German fashion with sauteed onion and garlic, and a generous dash of nutmeg.
But, you know me... I always think there is room for improvement. Today's improvement attempt? I want to try and eliminate the grey gummy-ness that often arises when you mix these with flour. I've tried everything (including making a roux out of it first), but today I'm going to try just completely eliminating it.
No flour.
So I guess you could call these bitches GLUTEN-FREE. If you were a wierdo. Or one of the very few (but still very unfortunate) people out there with Celiac disease. If you have Celiac disease [less than one percent (~0.75%) of Canadians], I truly am sorry... that really sucks. But for everyone else... if you've jumped on the Gluten-Free bandwagon anyway... you just haven't quite grasped the concept.
:)
<Sigh>... I suppose I will label this post as being GF, but only because it will attract more people.
Anyway, back to the Kartofelnpuffer!
First, I let the gross leftovers reach room temperature, and then I broke up the rubber ball of whipped potatoes into something a little more manageable.
Already, they began to look a lot more appetizing.
But, this is just the base for the 'batter'.
I'm still planning on making these out of fresh potatoes (and fresh thyme!)
Mmmmmmmm...
But, the batter needs to be a little stickier, so I mixed in an egg first.
Much better.
Next comes the second-worst part of making potato pancakes. The messy grating/squishing/juicing of the potatoes.
I won't go into a ton of detail, but for those who've never made potato pancakes (or any potato-based crepe or such), you generally need to separate the juice from the flesh. Which is messy (and can really sting if you have any open cuts on your hands or fingers) but necessary because potatoes can be surprisingly wet.
The trick, though, is to let the juice sit for a few minutes (or cool in the fridge) and wait for the potato starch to drop at the bottom.
When that happens, just discard the top liquid.
And what you're left with is like glue.
Well, it's like magic mud. You ever play with magic mud when you were a kid? Ahhh fun with non-Newtonian fluids.
:)
Anyway, this stuff is great for adding some stickiness back into the batter, so add that back into the mix!
In fact - if you wanted to make this Vegan as well, I'd suggest just adding a spoonful or so more potato starch in there. I always keep starches on hand in my dry goods cupboard. Most bulk stores, and health-food stores with decent dry goods sections carry several types of starch. Including potato starch which is awesome stuff.
So yah, this recipe has milk and butter in it from the leftover whipped potatoes I made for Thanksgiving, and an egg in there as well, but I have made vegan potato pancakes before, and more than once.
Just remember my mantra when it comes to vegan recipes: OMIT first rather than SUBSTITUTE first. Find out what you need after you've tried it without the animal-based ingredient. You might be surprised, and discover that you mightn't need anything at all!
In this case, omitting all animal products just makes it a littler harder to bind together. Nothing some starch and a very small dash of vegetable oil can't fix though.
Anyway... these are GF, not V... so back to it...
A dash of salt and pepper (and don't forget my fresh thyme) and that's ready to be cooked. Fried/Baked/Grilled whatevs.
I chose grilling. With a small amount of canola oil. On my awesome cast iron grill.
In case you were wondering earlier, when I mentioned grating potatoes as being the second-worst part of making potato pancakes, what was the first-worst thing?
Cooking all these pancakes takes a LOT of time. A surprising amount of time. Like 15 - 20 minutes for each batch. For this reason, I HIGHLY recommend you bring out your largest grill or pan (or multiple pans) and use them all.
One piece of advice I will give, for those of you new to this, is don't try to flip them too soon. You'll be worried it's burning under there, but wait, then you're certain it's burning under there, but still wait. The best way to know when it's ready to be flipped over is when it is actually capable of being flipped over. Try too soon and the whole thing will just completely fall apart. Trust me, I know from experience. Even when you use flour as a binding agent, this is still true.
Anyway, with tremendous patience and a modicum of attention paid, you will achieve fruitful results!
Personally, I'm a fan of ketchup. Ketchup often gets a bad rep. And I do too, for using it to the extent that I do. My friends have made it somewhat of a joke... at times. But to them, I simply reply with this: 'If you truly think I am such a ketchup-fiend, don't you think it stands to reason that I would be a very discriminate connoisseur of ketchup, and would ONLY consent to consuming the best ketchup?"
And from that, I would point out that 'the best' ketchups are the simplest and often just made of organic tomatoes, cane sugar, and vinegar. In fact my favourite ketchup IS just those three things. That makes this stuff actually kinda good for you and I challenge (actually I believe I just DID just challenge someone... or no-one...) anyone to say otherwise!
Phew <wipes forehead>.
That was quite the rant.
Anyway, I like ketchup on my P.P.
The wife, however, is a sour cream fan. Well, 0% Greek Yogurt anyway, which is a far healthier alternative to sour cream at any rate.
You can sprinkle some more fresh seasoning on top as well, if you like. But the best flavours are all going to be inside that magical puffer.
:)
My experiment, you ask? I think that flour really does not need to be in these. In fact, it so drastically changed the colour and consistency of them (for the better) that I think all my future iterations will be variations on flour-less potato pancakes!
I love my cast iron cookware.
If you take good care of them, cast iron can last forever. Care can seem daunting but it really doesn't have to be. You just want to make sure it is seasoned, and that it stays seasoned.
I just (today, coincidentally) found this TheKitchn link to a cool article I thought I'd point to, about using Flaxseed Oil to season your cast iron pans.
I love TheKitchn. They're definitely one of my favourite epicurean sites, and I am always excited to read their newsletters.
Anyway, I read it, and it makes sense to me, such that I believe I will be doing this from now on.
But today I just wanted to mention how awesome it is to have a huge grill for when you want to cook up large amounts of something.
I'm not sure how this would fit an electric range, but for my gas range, it just fits perfectly over two of the burners.
It does mean that there is a little bit of a dead zone in the middle, between the two burners, but it is manageable. In fact, I often use it to my advantage, moving things around on the grill to make sure nothing is getting too hot too quickly.
The other side (hence the appellation 'reversible') is a griddle, which is handy if I ever needed to cook a large amount of meat or veggies.
I love that both sides have troughs along the side wherein all the liquid ends up. Making it not as messy an affair as you might think, to grill copious amounts of food.
Anyway, I was cooking up some french toast and it occurred to me that I don't think I'd ever mentioned this puppy on here, so here it is!
I love my Lodge Cast Iron Reversible Grill.
:)
Well, it was that time of year again... Thanksgiving.
Well... it is for us Canadians, anyway.
Personally I like having a good feast-y kind of holiday in October... it's when there is a ton of fresh food available (after the harvest), and I've never understood why Americans like having their T-G so close to Christmas. But whatevs.. to each their own Thanksgiving I suppose.
This year we were just on our own, the wife and I, so we cooked a very small chicken. She was barely over 2 pounds.
And copious sides.
Really, the wife is all about the sides, and I'm all about the wife, so that means this T-G was all about the sides!
:D
I started with a kick-ass chicken from Roast. I've extolled the awesomeness of Roast before, but in case you've missed it, you need to check them out. Even if you're not from the neighbourhood, it's a great place.
Yah, it was only a couple of pounds, but that's more than enough for the wife and I. I brought it home and did a dry brine of coarse salt and fresh summer savoury, under the skin.
Which turned out to be a great combo BTW.
That only sat for about 24 hours in the fridge, dry-brining, but I was glad it had all got soaked/jellied up.
When I was ready to start cooking it, I took it out and rubbed some more savoury and salt and pepper on the outside of the skin. Then I brushed some melted butter on top for good measure.
Then, I cranked my oven up to bursting (525°F) and when it was heated, I put the chicken in. The trick is to maximize surface area during the sear stage, so I have this trick where I put a wire cage insert into my roasting pot first. This lifts up the bird and has it so that it is basically entirely exposed to that super hot, dry, air.
This crisps up the skin in no time at all. In fact, after about 10 minutes only, we were done, and she was super crisp and golden.
So, I carefully (with the wife's help) remove the cage and then I hastily deglazed the pot with about a cup of white wine, making sure to scrape the sides of all the good gribblies. Once that is done, I plop the chicken back in, this time resting right on the bottom of the pot. I shoved the cavity with a few sprigs of summer savoury, and then plugged the hole with an entire apple (I cored it only because I didn't want to have to pick seeds out of the gravy).
During this period, I've turned the oven down to 225° F, and opened the oven door to help it cool faster.
Then I grab my trusty meat thermometer, set it to 185° F, insert it in a thick spot above the leg, put the lid of the pot on, and--once the oven hits 225° F, in it all goes!
I didn't take any photos up until this point.
But, I decided to from here on, and starting with my first check/basting of the chicken.
At this point she was only about half-way done, and it was a perfect time to insert some juice back under the skin. I wasn't TRULY worried about her drying out; with the lid on and everything, she really stays quite moist... but I had ripped the skin in a few places doing the dry brine, and I just wanted to make sure those areas stayed moist.
Anyway, while that is slow cooking at a low temperature, I cooked up five different sides. Five sides for two people. What did I tell you about the wife being all about the sides? Well... yah...
First was the potatoes. Just straight up potatoes, but I didn't peel them. I boiled them with some summer savoury, and then drained them, and put the whole thing in a food processor. Technically you shouldn't use a processor to mash potatoes... but I wanted whipped potatoes for a change. So, a little bit of milk and butter (and a secret special splash of truffle oil) and some more summer savoury, salt and pepper, and it gets nice and frothy.
I learned a trick to keep potatoes warm, and put them all in my slow cooker for an hour or two.
It worked brilliantly and they were super warm still when it came time to eat.
:)
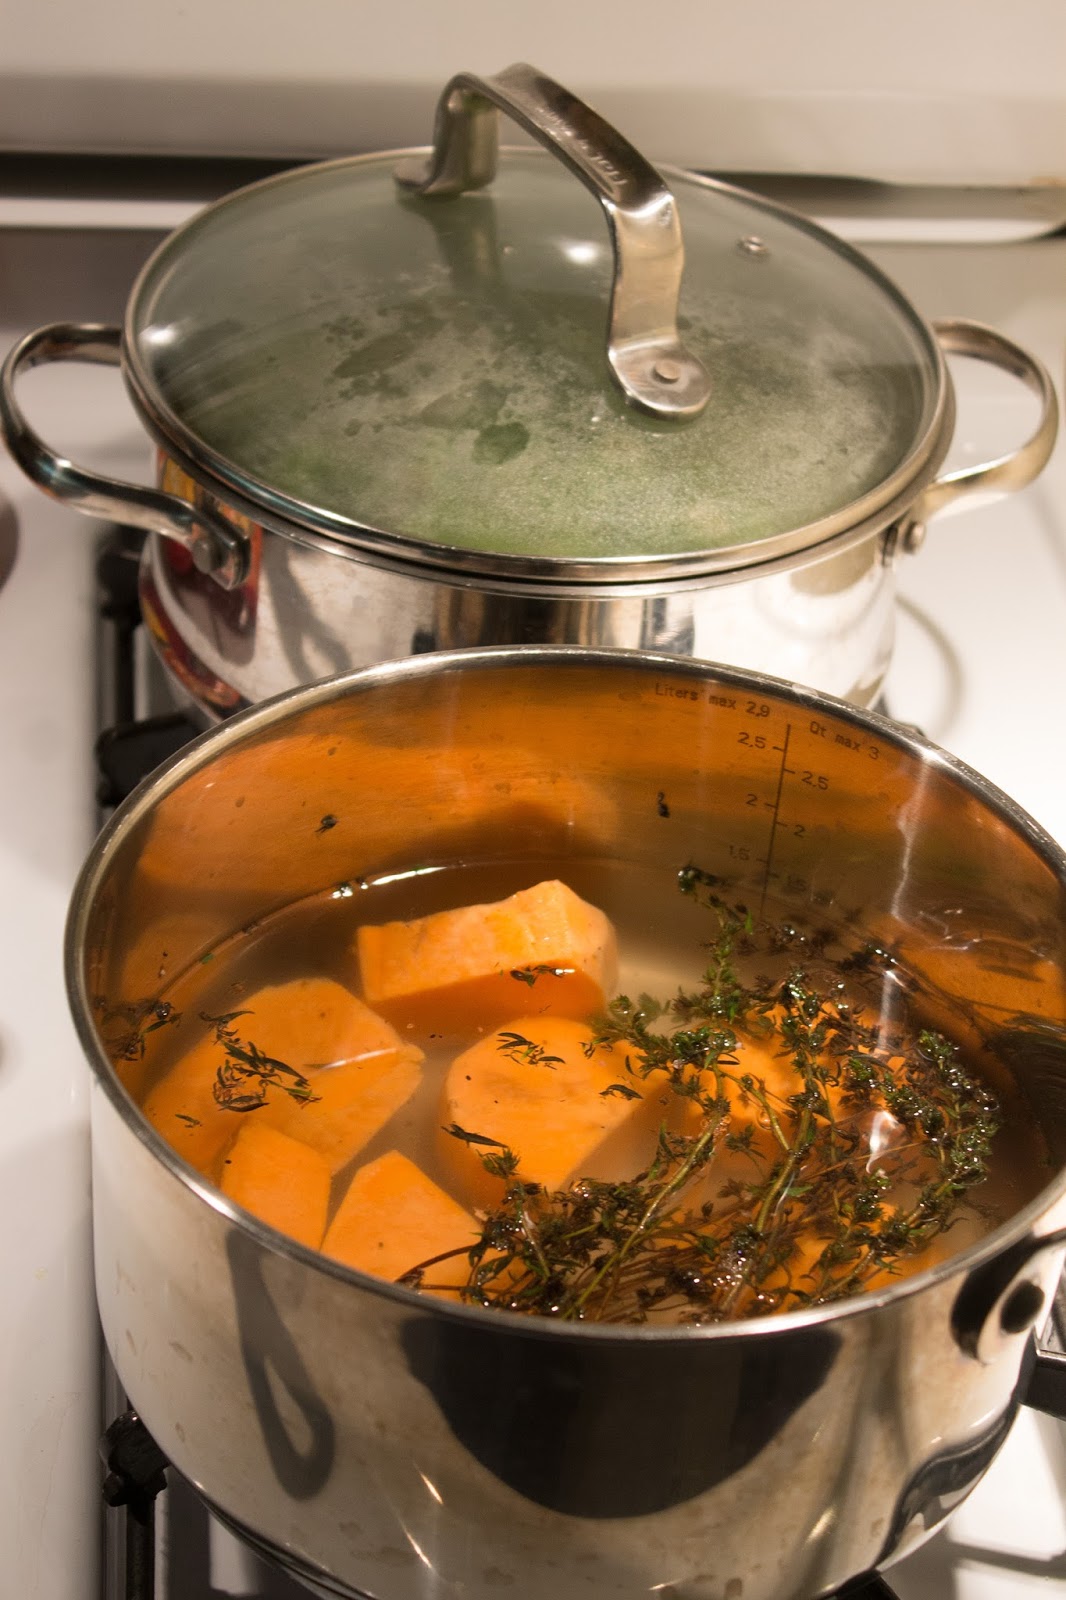
The other sides were sweet potatoes, corn, peas, and brussel sprouts.
I also snuck some summer savoury into the sweet potatoes.
It's easy enough to just pick out the sweet potatoes once they're cooked.
In case you haven't been able to tell, but summer savoury is the theme for tonight's Thanksgiving. I have long been a fan of savoury, but I actually found some FRESH savoury this year at one of the local farmers' markets. I couldn't believe it! I was so excited!
It ended up making my entire car smell like weed (who would have thought it had a skunky aroma?) on the drive home, but it was very tasty stuff!
Well, time passes... an hour and half or so later, my meat thermometer alarm goes off, and I took out the bird when she was at exactly 187° F.
She got set aside and put on a grooved cutting board to rest for about 10 minutes while I plated all the sides, and made the gravy.
There were a ton of great juices in the bottom of the pan, so all I had to do was add some salt, pepper, and cornstarch.
And periodically poured more juice from the cutting board.
Yup, there was a delicious gravy going on.
Mmmmmmmmmmmmmmm!!!!
Here are a quick bunch of shots of all the veggies:
And then I carved the meat.
So juicy and tender!
So delightfully flavourful.
The apple was subtle and not really registering in the 'sweet' at all, and the salty herby flavours came through most dominantly.
The potatoes did not look very appetizing in whipped form, but damn if they weren't delicious. Part of that could have been the truffle oil.
But all in all it was a delicious feast, and we were very thankful indeed!
Gotta have a close-up shot of the gravy!!!
Mmmmmmmmmmmmm...
And my plate:
Pre-gravy:
And, post-gravy:
Yay Thanksgiving!
Well, as promised (to myself... I promised myself), I bought a crazy amount of fresh fall apples.
I tried to take some artsy shots of my large bowl of Ontario-grown Honey Crisp and Royal Gala apples.
But, unfortunately for you, I'm a better cook than I am a photographer.
So perhaps you won't find these pictures as visually stunning as I think they are.
:D
Sure I'm only an amateur photographer, but that didn't stop me from pulling out all the stops (heh heh heh f-stops heh heh heh) on these. I brought out my tripod, opened up the aperture and exposure to capture as much warmth and shitty light that could be gleaned in my dark, dark, cavern of an apartment.
Bear in mind, this was a very cloudy day.
Anyway, I think they turned out beautifully, but again, what do I know?
This last one I played with the aperture so the background is nice and blurry; it's my favourite one.
Anyway... fun times with photos.
But really, the apples are awesome.
I'm going to make some pie, and I think I'll make some apple fritters.
<drool>
I've been getting better with my stir fry dishes.
The trick, at least for me--what I've noticed at any rate--is to actually AVOID all those processed sauces and condiments.
I always had on hand, soya sauce, teriyaki sauce, hoisin sauce, and others... and I was always under the impression that I should use them to make my Asian dishes taste good.
Well, I've learned not to do that anymore.
Really, I'm surprised it took me this long to figure out, considering I learned the same thing with other types of cooking decades ago. I have been balking at suckers buying ready-made sauces and condiments for what seems my whole life, so why would I think it OK to buy Asian condiments?
Anyway, I don't use them anymore.
Oh, I'll probably keep some soya sauce in the fridge for those times I want to sprinkle some over steamed rice... but in terms of using anything in the actual cooking or preparing of dishes, nope.
I've sort of gained the confidence to slowly phase a lot of that out over the years, and I've become gradually better at trusting my Asian cuisine abilities. Really that does factor in greatly. I would say I am a very confident Franco-Italian cook, and that could very well be the reason I can create some pretty awesome French and Italian dishes.
So, I suppose it stands to reason that as my confidence in my Asian cooking improves, so too will the quality of my cooking!
Let us hope, anyway!
So, another fallacy I've debunked when it comes to Asian cooking, is that it needs to be salty. It really doesn't. Especially if you use copious amounts of (the right kind of) herbs and spices.
Ginger is huge. I like a lot of ginger on a good day, but I find that it works exceptionally well with Asian cuisine.
Otherwise, I'll float a few other options. My favourite fresh green herb for stir-fry though, is parsley. It's fresh and slightly tangy and works very well with all the veggie flavours in there.
The second trick, one I wholeheartedly endorse, and strongly, strongly suggest regardless of whether you're a beginner or an expert, is to flavour your rice. Or whatever grain product you're serving under your stir-fry. Flavour it. Just do it. It doesn't have to be salty either.
The third and fourth trick, by the way, I will reveal later, but they both have become quite handy, so pay attention! ;)
I NEVER cook rice or quinoa or couscous anymore WITHOUT bouillon in the mix. Beef and Chicken bouillon are delicious, but Mushroom, Vegetable, or Miso bouillon are better for Vegetarians/Vegans. Just be careful - sometimes there are animal products in there still, even though there really shouldn't be a need for them!
Personally, I'm a fan of vegetable stock, but mostly just because I tend to keep jars of the stuff that I have canned myself.
That said, I highly recommend Miso bouillon if we're talking Asian-themed rice.
Miso cubes are also vegan, BTW.
And very flavourful.
And that's why I used them for this stir fry!
:)
YUM!!!!
And plus this way the rice doesn't end up overly salty.
Anyway... the rice is the easy part, and once cooked and fluffed, it can sit covered for quite some time and not really lose too much heat.
I start the rice first and then just turn the burner off once it's done. Sometimes that's an hour or more before the rest of the meal is ready; it's fine with stir fry, because you're putting some really piping hot veggies on top anyway.
The next valuable thing I learned which helps immensely with stir fries, is not necessarily unique to Asian cooking, but is just generally a method of best practice for most cooking.
Prep work.
Having all your ingredients all laid out neatly in an organized fashion is HUGE people.
If you don't use prep bowls, what the hell is your problem? They're there to help you after all. You're just shooting yourself in the unprepared foot if you aren't using them.
So, prep is always a good idea, but it is (I would argue) absolutely imperative when we're talking about cooking a time-sensitive dish like this. By this I mean something that involves your ingredients to be cooked at different times, heats, levels, etc.
This is the third trick I've learned with stir fry; DO NOT just dump all your ingredients in at the same time and cook. That might save you some time, but it will most likely ruin your meal.
Instead, get everything ready first, in some prep bowls. Yes, this is time-consuming. But it really is going to make a difference.
Here are some photos of all my prep work, before it looked all nice and tidy in the above all-assembled photo.
Cremini Mushrooms:
Incidentally, can you spot my mushroom brush in there?
Heh heh heh heh...
I bought that from un petit magasin culinaire in Québec last year. I love that it actually looks like a mushroom! :)
Ginger:
Again, if you've never learned to keep your ginger frozen in the freezer, give it a try! It's so nice to have fresh ginger on-hand all the time, and it grates very easily!
Spices:
For this dish I ground up some Allspice and some Pink Peppercorns. Both of which are dried fruit... isn't that cool?
Garlic, Shallot, and Green Onion:
Mince it all up.
(and don't skimp on the garlic.)
Next, chop your "hard" vegetables up so that they are all roughly the same size. This is important. You know what I mean by hard veggies. Anything that takes a while to cook, and which is typically blanched or steamed.
I'm simply doing green beans and carrots, but two other biggies for stir fry are cauliflower and broccoli, so if you're using those, make sure they are all cut to be roughly the same size (not just to each other, but to ALL the other veggies as well.) The simple reason here is just because we want them to all cook uniformly and for the same length of time.
You'll see.
Green Beans and Carrots:
Now comes the frying.
The above-mentioned third trick I've learned to make stir fries work out well... cooking everything separately and according to their own time.
And... getting flavour into the pan too... it's not complicated... just cook things in batches.
First up is the garlic and onion.
A generous portion of vegan becel goes in there. I used to use sesame or walnut oil by themselves, but I've come to greatly like cooking with vegan margarine, and to instead splash a dash of sesame oil in later for flavour (you'll see).
So, that gets nice and sauteed. But NOT golden. You want to take this off the heat maybe a minute before you would normally.
And then is removed from the pan. Yup, you heard me right. Take that out, put it back into its original prep bowl, or start another bigger bowl, it doesn't matter, just make sure you scrape the pan of all those bits of minced garlic and onion. We don't want it to cook anymore; on the time-senstive cooking scale I mentioned above, its time is done.
If you can squeeze some of the oil out, that's great. I was able to just hold a spatula to the bowl and tilt it over the pan, and I got at least 75% of the oil.
Into that gorgeous flavoured oil go the mushrooms. These can be cooked to your liking, but myself, I like really, really cooked mushrooms.
So I actually turn the heat up to medium-high, and let these fry for a good ten minutes.
I like my mushrooms golden and shrivelly (I believe that's the technical term... shrivelly).
You can put the mushrooms in with the onion and garlic you just cooked, and add the ginger at this point. I just did that in the pan.
And then scraped the whole thing out into a large prep bowl, to be set aside for now.
The reason we're separating these, is because we don't want them to have the same level (or even type, really) of cooking as everything else. So it doesn't hurt them to just sit for a few minutes while the other ingredients catch-up.
We have a gribbly-laden pan.
Which we want to deglaze.
So, let's pour in about a cup of fresh, filtered water, and a cube of bouillon (again, any would work, but I am choosing Miso again.)
Once the bouillon is nicely dissolved, pour in your 'hard' vegetables, the ones which you painstakingly chopped to be all the same size roughly. This liquid--incidentally--is my fourth trick. It's going to turn into this delicious, slightly thicker, super-flavour-packed, sauce which will be excellent when poured on to the rice at the end. No need for condiments or processed 'sauces'. This stuff is going to be awesome.
Toss these around a bit. I love tossing a full heavy pan like this. It's fun, and when people are watching it makes you look like a real culinary badass!
;)
After a minute or two, and after much of the liquid has evaporated, put a lid on the whole thing. Myself, I don't have a lid to fit this huge pan, so I had to cheat, and sort of put it inset.
The point is to just let it STEAM for the remainder of its cook time, so as long as you create somewhat of a seal, it's all good.
Turn the heat down to medium-low, or even low, and let these hard veggies steam for a good ten minutes or so.
At this point add your herbs and spices. As with most spices and herbs, there is a large amount of room for creativity here. I've used many different flavours. Remember that the garlic and ginger are going to take centre stage though (remember culinary spatter's rhetoric on complementary vs. dominant flavours in a dish).
So, myself, today, I've opted for a splash of fresh parsley.
And of course the pink peppercorn and allspice blend.
I'm going to mix these first, add a pinch of truffle salt (any salt will work), and get them all uniformly mixed before throwing them into the pan.
But, after the 'hard' veggies have had a good steaming, you can add EVERYTHING else into the pan. Including what you had saved before.
Now...give this a toss or two, and this is pretty much done and ready to pour on to a bowl filled with rice.
This is vegan.
But, as the post title suggests... I'm going to sneak in some chicken.
I like chicken in my stirfry... I'm sorry.
So, I fry that up (also separately... meat definitely needs to be afforded its own timeline).
So that it is nice and golden.
Again, note that each individual piece is relatively the same size; when cooked with adequate space between each piece, this ensures a uniform level of doneness.
Well, that's it, at this point you can throw everything into the pan and toss it about, like you see people do, and what is typically expected with 'stir-fry'.
YUM!!!
Ready to spoon/ladle/pour on to a bowl of rice.
Which is what I did.
So...
I know some of you might be saying... this dude has made extra steps for himself and made what can be a really simple dish into something overly complicated.
Well... you might be right, but this methodology has REALLY worked for me.
Like REALLY well.
Taking the time to ensure each differently-fleshed vegetable is cooked according to what it best needs (what will make each type of veggie truly shine in its own right) really makes a difference.
I promise.
A quick, medium-heat saute for the soft-fleshed garlic and onion, a high-heat sear for the mushrooms, a slow and low-heat steam for the harder-fleshed carrots and green beans, and then only after each has received this special treatment, toss them altogether in a pan.
Sure there are people who don't do this. They may even make better stir fry than I.
But this is what I've taught myself to be the method of best practice for stir-frying, and one which works extremely well for me.
So, if you've had difficulty in the past with stir-fry, or if you're an expert already but looking to add a level of OCD to your final product, this methodology just might yield you some surprising results!
:)
If not, hell, what do I know?