How, growing up, I'd never had tasty chicken or turkey? How (bless them) no one in my family ever really grasped how to roast a bird without it ending up dry and flavourless?
Sorry Mom, if you're reading this.
Well, the two things I've learned, which have become absolutely essential to cooking a good bird (to the point of it just not working out otherwise...) are:
- USE A MEAT THERMOMETER DAMN IT. Like seriously... why not? Your mother's mother's mother never used one, so she taught you to time it based on weight, or vague impressions of when 'juices run clear' or what-have-you. But we have this amazing tool at our disposal now. Many of them you can even just leave in, and program to go off when your desired temperature is reached. There is no reason not to use a meat thermometer except your own stubborn pride at thinking you can do it without. Just don't. It takes all the guess work out of foodbourne illness safety, and it WILL save you from over-cooking your fowl. It is probably the most important thing you can do when roasting a bird.
- DON'T SHY FROM SEASONING. Particularly salt. Sodium has been thought of negatively for decades now, but too many people aren't thinking straight about salt. When we say sodium is bad, almost 100% of the time, we're referring to processed foods, and added sodium. The kind of amounts we're talking about when you add a pinch here or there during regular, normal, home-made cooking, are not bad. Don't forget, we need salt in our diets.
- DRY BRINE FOR AT LEAST 48 HOURS. Preferably 72 hours. Yes. Three days of sitting, dry, in the fridge, open to the elements. Trust me. it works.
I used to do a wet brine, which is still better than no prep at all. This consists of soaking your bird in a mixture of salt and sugar and spices for at least 24 hours before cooking. This definitely infuses the flesh with flavour and moisture.
But... not as well, nor as efficiently as a dry brine.
I know, it seems counter-intuitive. How could a dry brine make your bird more moist than a wet brine??!!??
Well, I'll tell you.
It all has to do with science. In particular, concentration gradients. When you get a fresh bird, and before anything has been done to it, there exists within the tissues, a particular amount of... let's just call it... stuff. Well, that stuff wants to come out... if it can. Stuff wants to move from an area of high concentration to one of low concentration. That's just what stuff wants to do... and not just in turkeys, but in everything in the universe.
So how does this relate to wet vs. dry brining? The short answer is that a dry brine makes it so that this stuff has no where else to go but back into the turkey. The long answer? Well...
Applying salt directly to the tissues WILL pull out moisture and flavour. It will, and in fact the WORST thing you could do would be to apply a salt for too short a time, or even worse than that, apply a salt for half a day and then rinse it off! There goes all your good stuff.
So, in order to keep all that stuff inside your bird in a wet brine, you'd need to make the concentration of stuff in the water so high that the concentration inside the bird would be lower in comparison. And even then, it's only going to absorb a small amount of stuff.
A dry brine, on the other hand, will put everything (well, LOTS) back into the tissues. But not at first. At first that concentration gradient is wack high. It's crazy high on the outside of it because you've got the spices and salt and stuff literally sitting on top of it. So at first the stuff is going to go the OTHER way... out. But, because there is nowhere for that to go (no large pool of water into which this stuff can be dumped, dissolved, or spread into), all that turkey stuff doesn't go far (in fact, it goes into the brine). And, if you leave it long enough, the gradient will switch back and the flesh will actually suck all that stuff BACK IN!
The singular beauty of the dry brine is that, when re-absorbing, the bird has no choice but to ALSO bring with it all the flavours and spices you put on there, sucking it deep down into the meat tissues.
But this only happens if you leave it long enough. So the trick is to brine it for at least 48 hours, I like to do 72 hours.
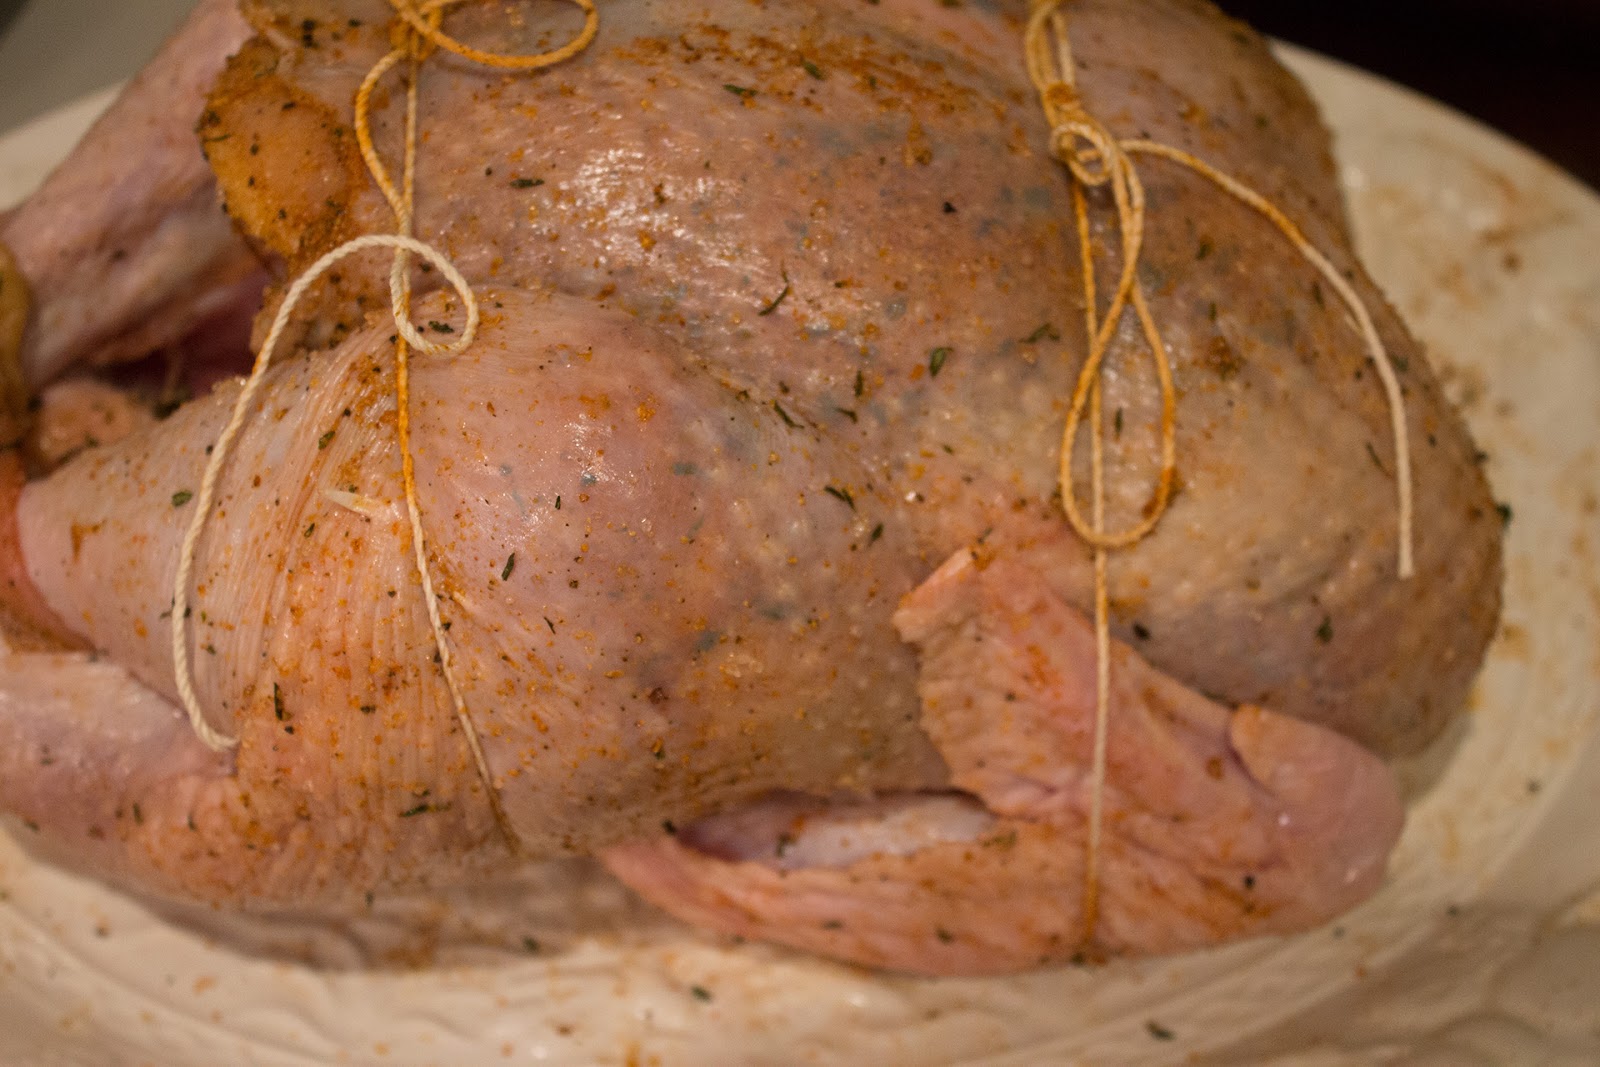
The brine itself doesn't have to be complicated. As long as it has a shit tonne of salt, and a generous spoonful of sugar, you can add anything else you like in terms of herbs or spices.
Myself, and particularly for festive birds like Christmas Turkey, I like to do a bit of nutmeg, cloves, and generous amount of thyme.

You can see that that is not a small amount of salt. I like coarse salt, personally. And for this particular use I'd also recommend steering clear of the flavoured salts. Save those for finishing salt on steamed veggies and the like...
The hardest part (read: grossest part) is stretching the skin off of the flesh.
<shudder>
As a flexitarian who has gradually gotten his meat consumption down to a few times a month, this is especially disgusting.
But whatevs. Other people were counting on this turkey.
I don't want to write too much about it, but basically after you've removed the giblets, and plucked any remaining feathers that slipped through the cracks, begin gently spreading the skin away from the flesh.
I start at one end, and gently work my fingers in further and further.


You can get the entire turkey done this way, and if you're careful, you can do it without ripping the skin in any place.
I lucked out this go around, and managed to get the entire turkey skin lifted without a single tear.
It helps the fresher your turkey is.
You might need to go in from both sides to get all the way around, but once the whole bird has been skin-lifted, gently start tucking the brine in everywhere you can.
I like to just pour it down there and then sort of spread it around as evenly as I can.
Any excess can be spread on the skin itself, outside, but make sure as much of the flesh itself under the skin is covered as possible.

When she was all brined, I trussed her back up again, and then put her in the fridge. Do not wrap/seal her with anything (like plastic wrap), but if you're worried about her sitting in the fridge next to other stuff, just loosely tent her with foil.
Letting her air-dry really really helps with brown skin during cooking.

Three days from this point, I shoved some miscellaneous veggie waste (carrot and celery leaves, sage and thyme stems, etc.) in there and then plugged it with an entire, whole-but-peeled, onion.
Sear her for 5-10 minutes at like 500°, then drop the temperature down to like 275° or 300° for the remainder of the roasting. When she reaches 185° she's done. For those perfectionists, that means you could pull her out a little before this time as she will keep cooking for a few minutes afterwards, but myself I like to just physically see that number before stopping the oven. Honestly, a turkey that goes up to 190° can still be QUITE moist and juicy.
When you do take her out, make sure she has at least 20 minutes to set before you even TOUCH her! Just gently tent her with foil. If you cut her too soon, she'll just leak all that delicious juice out!
Honestly this is perfect most of the time anyway, because you're going to want to make a GRAVY!!! Right? Please tell me you're going to make a gravy...
Anyway, this method has taken me many years to master, and I have to say I can cook a pretty mean turkey at this point in my culinary career. This one was better than last year's, which was better than the year before's... so I guess it stands to reason that next year's turkey will be fantastic!